
If you’ve got a radiator not heating up properly, you’re not alone, it’s one of the most common heating complaints in UK homes. There is something uniquely dispiriting about waking up on a cold January morning, padding across the landing, and finding one radiator stubbornly cold while the rest of the house warms through. The good news is that most causes are straightforward to diagnose, and many can be fixed with a radiator key and a little patience. This guide walks you through the problem logically, from the simplest checks to the fixes that need a bit more work. It covers standard wet central heating systems, the kind found in millions of UK properties with combi, system, or open-vented boilers. Electric radiators are a different beast entirely and are not covered here.
Table of Contents
- Why Is My Radiator Cold? The 4 Most Common Causes in UK Homes
- Quick Checks Before You Start (Save Yourself Time)
- Step 1 – Bleed the Radiator (For Cold Tops)
- Step 2 – Check the TRV Valve Pin (For Stuck Valves)
- Step 3 – Check for Sludge and Blockages (For Cold Bottoms)
- Step 4 – Balance Your Radiators (For System Imbalance)
- When to Call a Professional Heating Engineer
- Preventing Radiator Problems in 2026 and Beyond
Why Is My Radiator Cold? The 4 Most Common Causes in UK Homes
When a radiator fails to heat, the fault almost always falls into one of four categories. First, trapped air inside the panel, which leaves the top section cold while the bottom stays warm. Second, a build-up of black sludge, known as magnetite, which settles at the bottom and blocks the flow. Third, a stuck thermostatic radiator valve pin, where the valve body itself seizes shut even though the plastic head is turned up high. Fourth, a system imbalance, where water takes the path of least resistance and short-changes radiators further from the boiler.
These four issues account for the vast majority of cold radiator callouts across the UK each year, particularly in areas with hard water or homes with older steel panel radiators and cast-iron heat exchangers. The reassuring point is that three of the four can be tackled without calling a heating engineer. If you notice the radiator is cold but the pipe feeding it is hot, the blockage is almost certainly at the valve or inside the radiator itself, which narrows the diagnosis considerably.
Quick Checks Before You Start (Save Yourself Time)
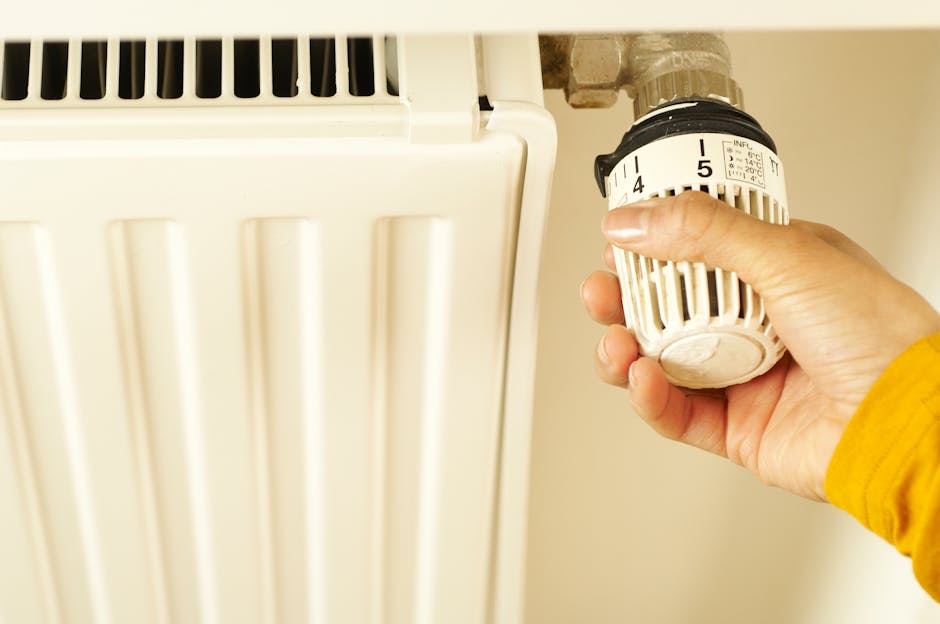
Before reaching for tools, run through three checks that take less than a minute. First, confirm both valves are fully open. The thermostatic radiator valve, the one with numbers on it, should be set to 5 or the maximum setting. On the opposite side, the lockshield valve, usually hidden under a plastic cap, should be turned fully anti-clockwise. Second, glance at your boiler pressure gauge. It should read between 1.0 and 1.5 bar when the system is cold. If the needle has dropped below 1.0 bar, use the filling loop to repressurise the system, following the manufacturer’s instructions. Third, check that the room thermostat and programmer are actually calling for heat. It sounds obvious, but a timer set to “off” or a thermostat with dead batteries catches out plenty of households every winter.
Step 1 – Bleed the Radiator (For Cold Tops)
If the top of the radiator is cold but the bottom is warm, trapped air is the culprit. Air rises to the highest point in the panel and prevents hot water from filling it completely. This is the easiest fix and the one you should try first.
You will need a radiator key, available for a pound or two at any hardware shop, Screwfix, or Toolstation, plus a cloth or small bowl to catch drips. Start by turning the central heating off and letting the system cool for at least twenty minutes. Locate the bleed valve, a small square nut set into a round fitting at the top corner of the radiator. Insert the key and turn it slowly anti-clockwise. You will hear a hiss as compressed air escapes. Keep the key in place and wait. When a steady trickle of water appears, close the valve by turning clockwise. Wipe away any water and move on to the next radiator if needed. If you have a combi boiler, leaving the boiler switched on at the mains but with the heating off can use mains pressure to help push stubborn air pockets out.
Step 2 – Check the TRV Valve Pin (For Stuck Valves)
When the inlet pipe is hot to the touch but the radiator body stays cold, the thermostatic radiator valve is the prime suspect. Inside the valve body, a small metal pin rises and falls to control water flow. Over the summer months, this pin can seize in the closed position.
To check it, unscrew the plastic TRV head by hand, there is usually a knurled retaining ring at the base. Once removed, you will see a small metal pin protruding from the valve body. Press it down gently with the flat side of a spanner, the back of a spoon, or a pair of pliers. It should move down with some resistance and spring back up freely when released. If it stays stuck down, apply gentle, repeated pressure to work it loose. A small spray of WD-40 or silicone lubricant around the pin can help free a stubborn mechanism. Heating engineers have noted that certain brands, including Drayton and Danfoss, are more prone to jamming than some budget Italian valves. If the pin is completely immovable or visibly corroded, the valve body itself may need replacing, which is a job for a professional.
Step 3 – Check for Sludge and Blockages (For Cold Bottoms)
A radiator that is hot across the top but cold along the bottom panels is showing the classic sign of sludge accumulation. In UK central heating systems, black iron oxide sludge forms when water reacts with the steel inside radiators. Over time, this heavy sediment settles at the lowest point and blocks the flow.
For a DIY approach, a chemical cleaner can often shift light to moderate sludge. You will need to drain a small amount of water from the radiator via the bleed valve or a drain-off point, then introduce a sludge remover such as Sentinel X400 or Fernox F3. These products are widely available and designed to be left circulating in the system for a week or two while you run the heating normally. After the treatment period, the system should be drained and flushed thoroughly. For heavier deposits, or if the radiator remains cold after chemical treatment, a professional power flush is the next logical step. This process uses a specialised machine to force water and cleaning chemicals through the pipework at high velocity, dislodging years of accumulated debris. It is one of the most effective ways to restore a sluggish system and is a core service we provide at heatingpowerflush.com.
Step 4 – Balance Your Radiators (For System Imbalance)
If some radiators in your home heat up rapidly while others, usually those furthest from the boiler, stay lukewarm or cold, the system is likely out of balance. Balancing adjusts the flow so that every radiator receives its fair share of hot water.
The principle is simple: you restrict flow to the radiators closest to the boiler, forcing more water to travel to the distant ones. Start with the heating off and all radiators cold. Open every TRV fully. Turn the heating on and walk around the house, noting which radiator heats up first. On that fastest radiator, close the lockshield valve by a quarter turn and wait ten minutes. Check whether the slowest radiator is now warming up. Repeat the process, making small adjustments and waiting between each one, until all radiators heat at roughly the same pace. This is a trial-and-error method and requires patience. In larger homes or those with complex pipe layouts, achieving perfect balance can be fiddly, and a heating engineer with a thermal imaging camera can do the job more precisely.
When to Call a Professional Heating Engineer
There are several scenarios where DIY fixes reach their limit. If you have worked through every step above and the radiator is still cold, the blockage may be deeper in the pipework. A telltale sign is when only one of the two pipes connected to the radiator gets hot. Microbore pipe systems, which use narrow 8mm or 10mm pipes common in UK homes built from the 1970s onwards, are particularly susceptible to blockages and are difficult to flush without professional equipment. A full system power flush involves a Gas Safe registered engineer connecting a high-flow pump to your heating circuit, circulating powerful cleaning chemicals, and flushing out every radiator and pipe run. The result is a system that runs more efficiently, heats up faster, and places less strain on your boiler. If you are in Scotland or the North of England, look for an engineer with specific experience in older housing stock, where pipework can be decades old.
Preventing Radiator Problems in 2026 and Beyond
A few simple habits will keep your radiators working reliably through 2026 and for years to come. Bleed all radiators at the start of each autumn, before the heating season begins, to clear any air that has collected over the summer. When you top up the system pressure, consider adding a corrosion inhibitor like Sentinel X100 or Fernox MB-1. These products coat the inside of radiators and pipework, preventing the chemical reaction that creates sludge in the first place. If your home still has old manual TRVs, upgrading to modern smart TRV heads from brands like Hive, Nest, or Drayton Wiser gives you finer control over individual rooms and reduces the chance of pins seizing during long periods of inactivity. Finally, make a monthly habit of checking the boiler pressure gauge. A slow pressure drop can indicate a small leak somewhere in the system, and catching it early prevents a minor issue from becoming a major repair.